Running AhsayOBS & AhsayRPS on NAS Devices
This document was last updated on 5-May-2008.
Introduction
We have been asked by our customers many times whether
AhsayOBS will run
on lower cost NAS devices or not. With the growth in storage capacity
of today's NAS devices, it is obvious that NAS devices are ideal
platforms to run AhsayOBS because they possess the
storage capacity required by AhsayOBS but cost only one
fraction of the cost of a standard server. This is why we have
conducted some studies on the
feasibility to run AhsayOBS on various NAS devices recently.
We managed to find a couple of ways to running AhsayOBS on
various NAS devices. However, the performance of AhsayOBS
running of
these NAS devices varies. After many testings and investigations, we
can
conclude that the bottleneck of running AhsayOBS on NAS devices is the
memory available. Most small NAS devices (e.g. 1 - 2 bays NAS
devices) contain no more than 128MB and AhsayOBS requires at least
256MB (512MB recommended) to run smoothly. Therefore, we rule out all
NAS devices that cannot have their memory easily upgraded by users.
This
leaves us only a handful of NAS devices suitable for AhsayOBS and out
of all these NAS devices. Recently we have tested and successfully
installed AhsayOBS on the devices of Thecus
N4100+, Thecus
N5200 and Buffalo
LinkStation Pro.
In order to further simplify the installation
process, we have
combined AhsayOBS and AhsayRPS into a single software. The codename of the combined software is now called AhsayOBSR.
General limitations of using NAS devices
The disadvantage of running AhsayOBS on a NAS device instead of on a full server is that NAS device is much less scalable than a PC server. It is because it has limited memory and much less CPU power. If you expect to have large number of users (e.g. more than 200 users) on your AhsayOBS running on NAS devices, it is recommended to use a more powerful standard server instead. Since different NAS devices have different limitations, please check the "Limitation" part in the installation instructions before making your choice of which supported NAS devices to buy.
Before Installing
Before installing, please make sure that:
- Your
NAS device is supported. Currently, only the following
NAS devices are supported:
Warning: Please do not apply the instructions in this document
to
any other unsupported NAS devices, including Thecus 1U4500, unless you
are absolutely sure that you fully understand the device and are
absolutely sure of what you are doing. If you are
interested in adding AhsayOBSR support of other NAS devices, please
contact Ahsay
customer service representatives.
- Your NAS device has been configured to meet the
minimum requirements for the specific model (please read the Supported Models
section).
- You
are accessing the NAS device plugged onto the same subnet. If you are
not a
network specialist, you are recommended to use the factory default IP
address or enable DHCP on the NAS device.
- The NAS manufacturer web administration console is running on
default TCP ports (i.e. 80 and 443) and no
other modules/applications on the NAS device are using port 80 and 443.
After installation, AhsayOBS & AhsayRPS will use ports 80 and
443 for their web administration console and the NAS
manufacturer web administration console will be relocated to ports
8080 and 8443.
- The NAS device is connected to the internet. This is important. AhsayOBSR requires internet connection to activate its evaluation license. (i.e. when you press the [Manage System] -> [Software License] -> [Update] button)
Install AhsayOBS & AhsayRPS on NAS Devices
Please follow the steps below (in order) to install AhsayOBS & AhsayRPS to one of the supported NAS devices.- Download AhsayOBS & AhsayRPS
installation wizard for NAS devices
- Download the aobsrnas.exe to your computer.
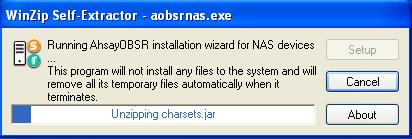
- Open
the wizard
- Double-click the "aobsrnas.exe" to open the wizard.
- A message
will pop-up to ask for confirmation. Press [OK] to continue.

- Wait
until all files are extracted to the system temporary directory. Please
note that it can take up to 2 minutes to extract all files on slow
computers.
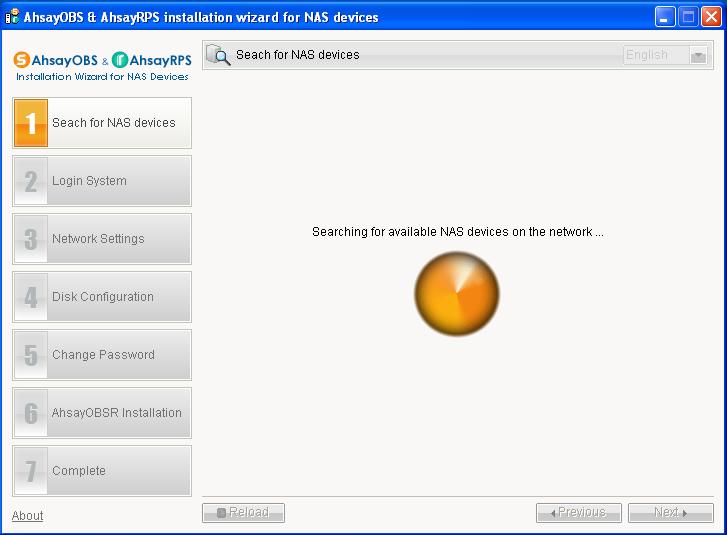
- The installation wizard will start and search for supported NAS devices available on the network automatically.
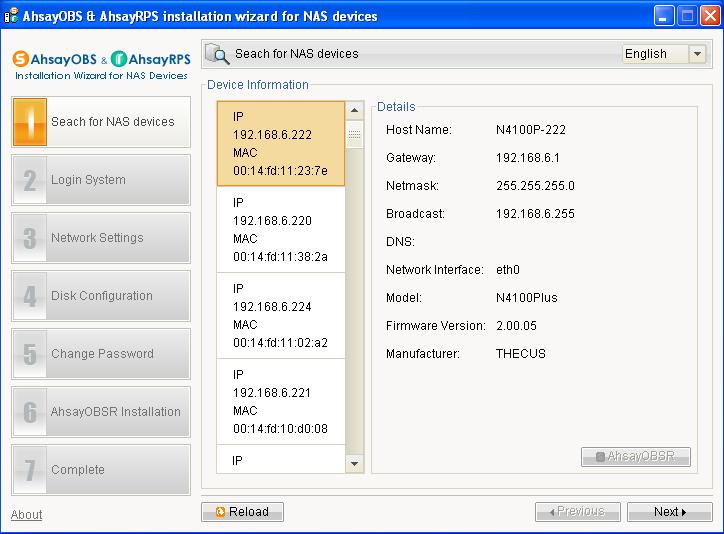
- Select and access the NAS device
- If
the NAS device is connected to your network, you should be able to see
the NAS device on the list. If you have more than one NAS device on the
network, you can identify each of them by the information displayed on
the
right hand side. Please select the correct NAS device and
press the [Next] button to
continue.
- For some NAS
devices, the installation wizard has to login as the administrator to access
them. If you have not changed the password before, the default password
will be entered into the field provided for you automatically. Otherwise, please enter the correct password
in the
text field provided. Then press the [Next] button to continue.
For those NAS devices that don't require authentication (e.g. Buffalo LinkStation), the installation wizard will skip this login page and jump to the next step automatically.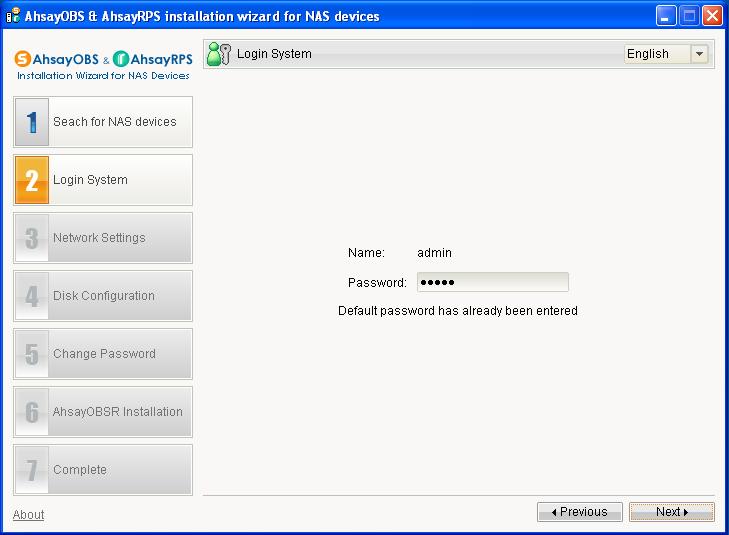
- If
the NAS device is connected to your network, you should be able to see
the NAS device on the list. If you have more than one NAS device on the
network, you can identify each of them by the information displayed on
the
right hand side. Please select the correct NAS device and
press the [Next] button to
continue.
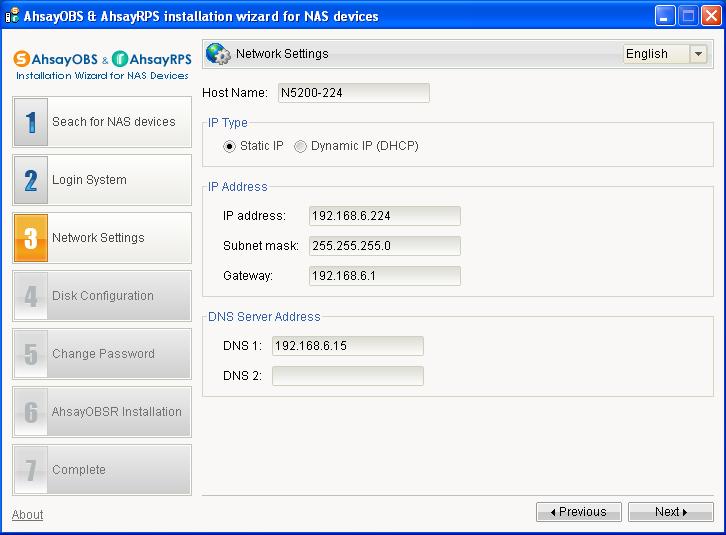
- NAS Device
Settings
- The wizard
will now bring you to the [Network Settings] step. The following
settings are available:
- Host name of the NAS device
- Static IP or Dynamic IP
If you prefer to use a static IP for your NAS device, please supply the correct [IP address], [Subnet mask], [Gateway] and [DNS] settings to the fields provided (please drop down both the IP address and the hostname of the NAS device you have entered on this page on paper). Also, when using [Static IP], please make sure that the IP address of the computer running the installation wizard and the IP address of the NAS device is on the same subnet.
- Under the [Disk Configuration] step, the information of hard disks installed on
the NAS device will be displayed automatically.
For some NAS devices, RAID has to be built before the installed hard disks can be used. In this case, if RAID has never been built, please select your desired [RAID Level] (RAID5 recommended) in the [RAID Information] section and press the [Next] button to build the RAID file system. The time requried for building RAID varies from different NAS models as well as the RAID level you have chosen. On some systems, it can take up to 10 hours to finish building a 1TB RAID 5 file system consisting of 5 drives. Please be patient when building RAID. After the RAID file system has been built, the [Status] field under the [Raid Information] section will be changed to "Healthy". You can then press the [Next] button to continue.
For those devices that do not support RAID (e.g. Buffalo LinkStation), all [RAID Level] options will be disabled. You can simply press the [Next] button to continue.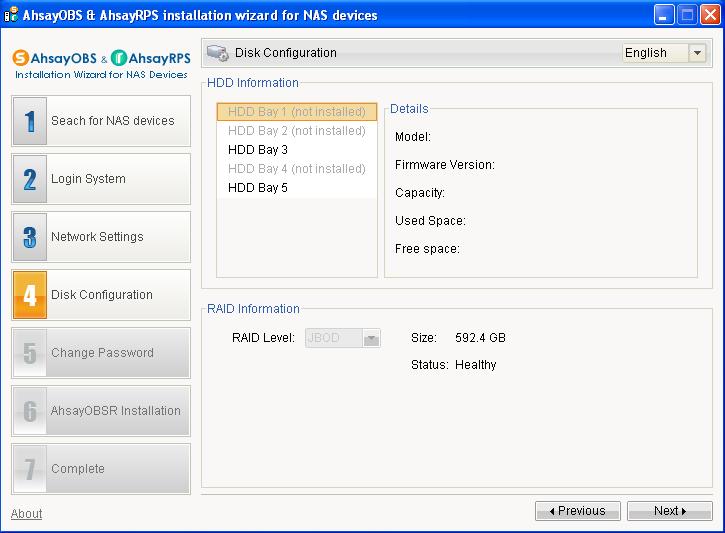
- (optional)
If you want to change the administrator password of the NAS
manufacturer administration console for better security, just check
the [Change Password] checkbox and
enter your new password.
For those devices that do not require authentication (e.g. Buffalo LinkStation), the wizard will skip this page automatically.
- The wizard
will now bring you to the [Network Settings] step. The following
settings are available:
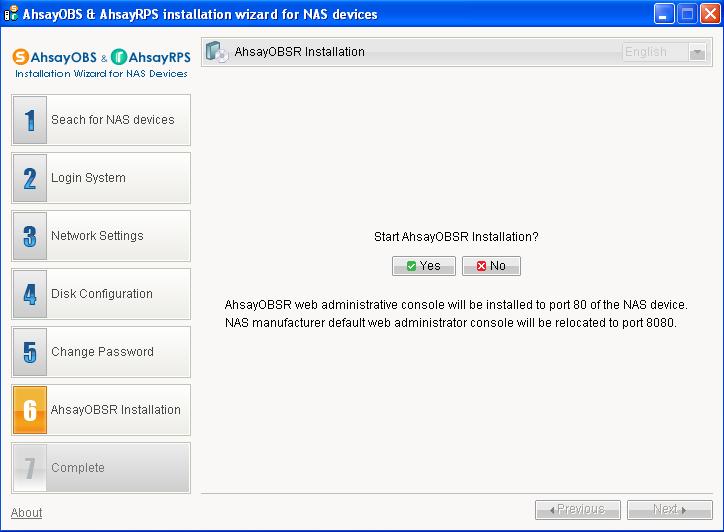
- Install AhsayOBS & AhsayRPS
- Now
you are ready to install AhsayOBS & AhsayRPS to the
NAS device. Since the NAS device will be rebooted automatically after
installation, please make sure you have nothing important
running on the NAS device before you press the [Yes] button to start
the installation process.
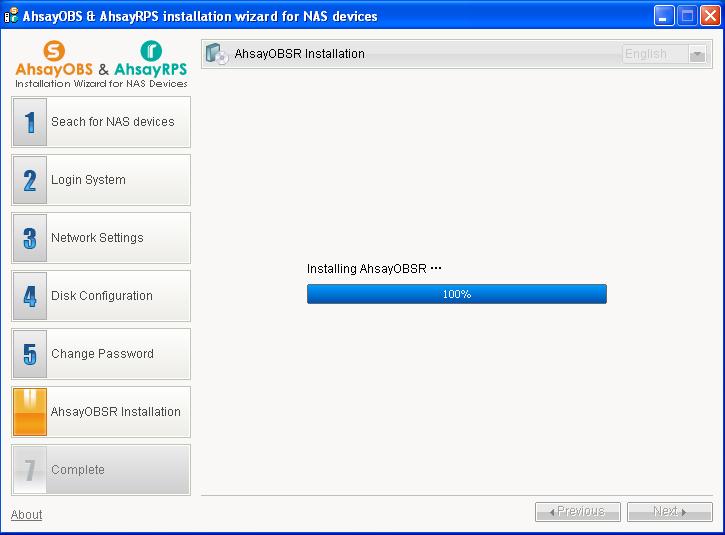
- The installation
process can take up to 5 minutes. The NAS device will be rebooted upon
completion. After rebooting, it will take another 5 minutes for the NAS
device
to startup the AhsayOBS & AhsayRPS service. Please note that NAS
device is not as powerful as standard PC server and be patient with
this.
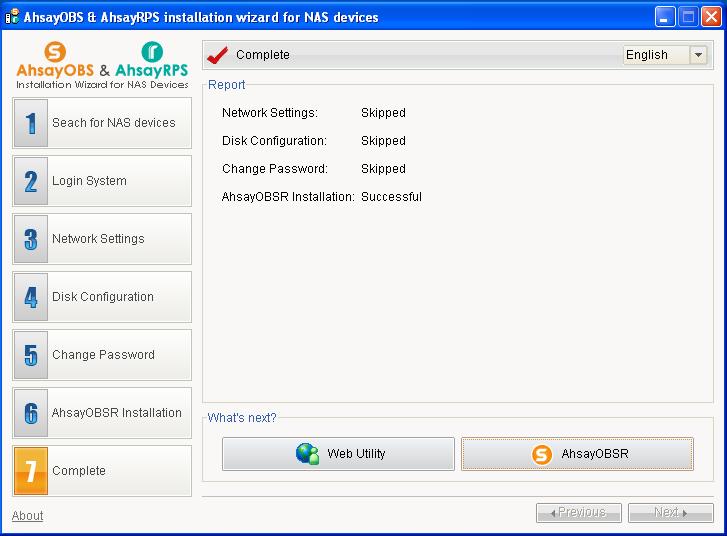
- When
the
installation is complete and AhsayOBS & AhsayRPS services have
been
started successfully, a summary report containing what have been done by the installation wizard will be
displayed. You can now press the [AhsayOBSR] button to open the
AhsayOBSR web administration console.
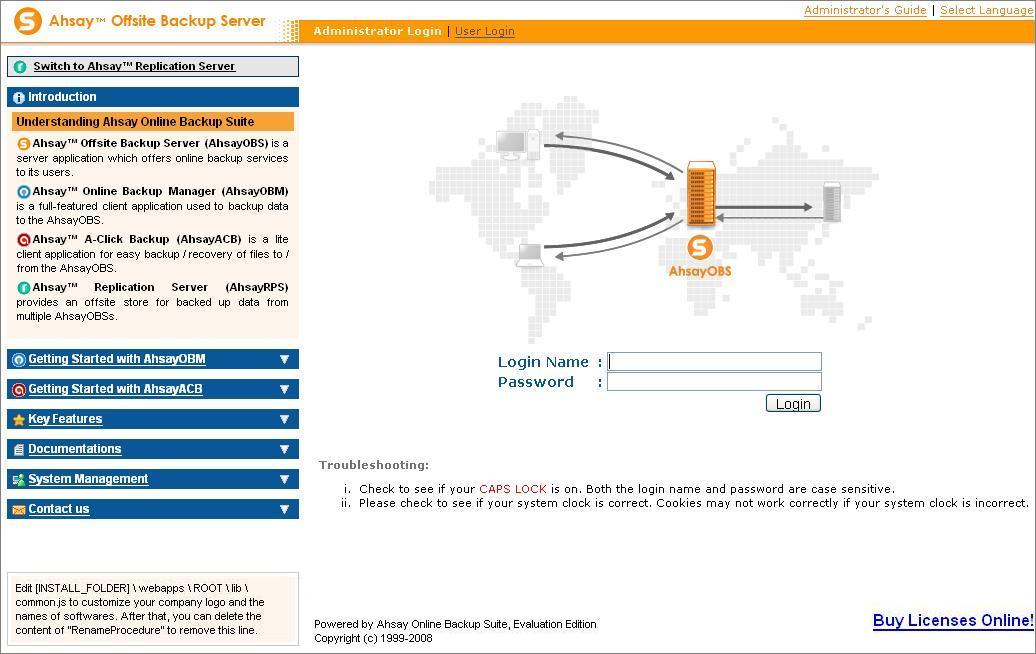
- If you can see the AhsayOBSR web administrator
console, the installation has completed successfully. Both AhsayOBS
& AhsayRPS are now ready to use.
- Now
you are ready to install AhsayOBS & AhsayRPS to the
NAS device. Since the NAS device will be rebooted automatically after
installation, please make sure you have nothing important
running on the NAS device before you press the [Yes] button to start
the installation process.
Backup to AhsayOBS running on NAS devices
To get started, please follow the steps below:- On the menu of the left panel of AhsayOBS startup page, select [Getting Started with AhsayOBM] or [Getting Started with AhsayACB] (depending on whether AhsayOBM or AhsayACB you want to use) and click on the link provided. Clear instructions of hwo to install AhsayOBM / AhsayACB will be given in a pop-up window (please note that loading this page for the first time can be slow).
- After installing and configuring AhsayOBM / AhsayACB, start the software and enter "OBSR" (if you have chosen to use DHCP) or the IP address of the NAS device as the backup server URL. By default, both AhsayOBM and AhsayACB use "HTTP" as their protocol. If you want better security, simply select the "HTTPS" option.
- You can now backup all your files / databases using AhsayOBM / AhsayACB to AhsayOBS running on the NAS device as if AhsayOBS is running on a standard PC server.
Upgrade / Uninstall AhsayOBS & AhsayRPS
Please follow the steps below to upgrade / uninstall AhsayOBS & AhsayRPS. Assuming that you were using all the default settings during installation,- Follow the instructions of how to install AhsayOBS & AhsayRPS until you have reached the installation step.
- If AhsayOBS & AhsayRPS are installed, the wizard will ask if you want to [Upgrade AhsayOBSR], [Uninstall AhsayOBSR but keep all users' data and settings] or [Uninstall AhsayOBSR and delete all users' data and settings]. Running any of these options here will reboot the NAS device upon completion, please make sure there is nothing important running on the NAS device when you are doing this.
- To upgrade AhsayOBSR, select [Upgrade AhsayOBSR] and press the [Next] button. AhsayOBS & AhsayRPS will be upgraded automatically. This process is similar to the installation process.
- To uninstall AhsayOBSR, select [Uninstall AhsayOBSR but keep all users' data and settings] to uninstall the program files of AhsayOBS & AhsayRPS from the NAS device but it will retain a copy of all users' data and system setting for later use. If you are sure that ALL data and settings are no longer wanted and you want to remove them altogether, please select the [Uninstall AhsayOBSR and delete all users' data and settings] option.
- After uninstalling AhsayOBS & AhsayRPS, the NAS manufacturer administration console will be relocated back to port 80 and 443 automatically.
Supported Models
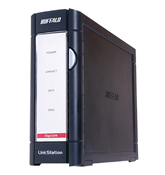
Buffalo LinkStation Pro
Appearance:
Requirements:
No special requirement for this model.
Hardware Specification & Limitations:
The followings are the limitations of Buffalo LS-Pro which will affect the performance of AhsayOBS & AhsayRPS.- RAM: Max. 128MB and it is not upgradeable,
- CPU: Marvell Orion 5182 500MHz (ARM-based)
- Storage: Max. 1 hard disk and no redundancy
- User: Stress test of concurrent backup from 10 users has been conducted.
Other information:
- Buffalo LinkStation Pro Duo is NOT supported by this NAS installation wizard because it has only 64MB of RAM and it would be difficult to run AhsayOBS & AhsayRPS with only 64MB of RAM.
- RAID is not supported for this model
- By default, AhsayOBS
& AhsayRPS are installed with the following settings:
- System Home = /mnt/disk1/.obsr/system/obsr-system
- User Home = /mnt/disk1/.obsr/system/obsr-user
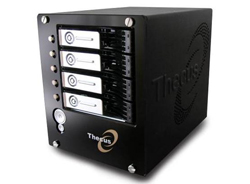
Thecus N4100+
Appearance:
Requirements:
- Upgrade Thecus N4100+ firmware to v2.0.03.
- Replace the 256MB DDR2 memory module with 512MB DDR2 memory module if you plan to use AhsayOBS & AhsayRPS on Thecus N4100+ in a production environment with more than 10 users, though AhsayOBS & AhsayRPS should still work with 256MB RAM.
The followings are the limitations of Thecus N4100+ that will affect the performance of AhsayOBS & AhsayRPS.- RAM: Upgradeable to 512MB (default 128MB)
- CPU: Intel(R) 80219 600MHz (ARM-based)
- Storage: Max. 4 hard disk bays
- User: Stress test of concurrent backup from 25 users has been conducted
- For building [RAID5] on 4 hard disks, it spends about 10 hours to complete the process.
- By default, AhsayOBS & AhsayRPS
are installed with the following settings:
- System Home = /raid/module/obsr/system/obsr-system
- User Home = /raid/module/obsr/system/obsr-user
Thecus N5200
Appearance:
Requirements:
- Upgrade Thecus N5200 firmware to v2.00.04 (you must be at least on v1.00.06 already, see N5200 module list).
- Replace the 256MB DDR2 memory module with 512MB DDR2 memory module if you plan to use AhsayOBS & AhsayRPS on Thecus N5200 in a production environment with more than 10 users, though normally AhsayOBS & AhsayRPS still work with 256MB RAM.
The followings are the limitations of Thecus N5200 that will affect the performance of AhsayOBS & AhsayRPS.- RAM: Upgradeable to 1GB (default 256MB)
- CPU: Celeron M 600MHz
- Storage: Max. 5 hard disk bays
- User: Stress test of concurrent backup from 100 users has been conducted
- For building [RAID5] on 5 hard disks, it spends about 10 hours to complete the process.
- By default, AhsayOBS &
AhsayRPS are installed with the following settings:
- System Home = /raid/data/module/obsr/system/obsr-system
- User Home = /raid/data/module/obsr/system/obsr-user
Further Information
- AhsayOBS Version Embedded = 5.5.0.0 pre-release
- AhsayRPS Version Embedded = 5.5.0.0 pre-release
- AhsayOBM/AhsayACB Version Embedded = 5.2.6.0
- Official release of AhsayOBS/AhsayRPS/AhsayOBM/AhsayACB 5.5 will be bundled into the package (aobsrnas.exe) when available.
- The Java Runtime Environment (JRE) embedded to the package will expire within 90 days, and AhsayOBS & AhsayRPS will stop working at the same time. If you are interested in using AhsayOBS and AhsayRPS on the NAS device, please contact Ahsay sales representatives for a quotation of Java royalty fee required.
- For more information on AhsayOBS, AhsayRPS, AhsayOBM and AhsayACB, please refer to the document section of our website.